A client in Plumstead phoned me on a Tuesday in February, panicking. Her pool had dropped 8cm overnight. She was halfway to calling the City to report a burst main under the driveway. I drove out, did a bucket test, walked her around the pump room. The pool was fine. February in Cape Town, hot Berg wind, no cover. She was losing water to the sky.
Same week, Somerset West, owner swore his pool was holding water. It wasn’t. Hairline crack behind a return jet leaking roughly 60 litres a day, slow enough that the autofill (which he wasn’t supposed to have) was hiding it. We found it inside 90 minutes.
Both scenarios are normal. The skill is knowing which one you’ve got before you start pulling things apart.
Evaporation vs an actual leak: the bucket test
Before you spend a cent on a professional, do this. The bucket test is older than I am and it still works.
- Fill a 10-litre bucket about three-quarters full with pool water and stand it on the top step of the pool, or on a submerged ledge. The bucket needs to be in the water, with the water level inside the bucket matching the pool water level.
- Mark both water levels — the level inside the bucket, and the level in the pool — with insulation tape or a permanent marker. Take a photo.
- Turn off the pump. Turn off the autofill if you have one. Walk away for 24 hours.
- Come back. Compare the two drop levels.
If the bucket and the pool have dropped by roughly the same amount, you’re losing water to evaporation. That’s it. No leak. Put the cover on the pool, especially overnight, and move on with your life.
If the pool has dropped noticeably more than the bucket, you have a leak. Now we can talk numbers. A pool losing more than about 6mm a day above the evaporation rate is leaking enough to matter.
What evaporation looks like in Cape Town
People are shocked at how much water a pool can lose to evaporation. In a January heatwave with a south-easter blowing and no cover, an uncovered pool can comfortably lose 25 to 40mm in 24 hours. In winter, covered, you might lose 2mm a day. Wind matters more than temperature. A 28-degree windless day evaporates less than a 22-degree day with a gale running. If your pool is open, exposed, and the south-easter is going, it’s losing water. That’s not a fault. That’s physics.
The autofill problem
A lot of Cape Town pools have autofill valves. A small float in the skimmer, plumbed to the mains, topping the pool up when the level drops. Banned under most water restrictions. And catastrophic when you’re trying to diagnose a leak, because the leak gets hidden — the water level never drops, the autofill just runs harder.
The first thing I check on any leak detection call is whether there’s an autofill. If there is, we isolate it. If your water bill has crept up but your pool level looks fine, suspect the autofill first. I had a Hout Bay client whose autofill was effectively running a garden hose into a hairline skimmer crack for nine months. The bill was R8,400 above normal before he noticed.
Where Cape Town pools actually leak
After nine years and a few hundred leak jobs, the distribution is fairly predictable.
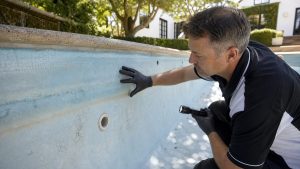
Skimmer and return jet seals. Top of the list. The skimmer throat (where the skimmer body meets the pool shell) is a notorious leak point on older Marbelite pools. The Marbelite cures and shrinks slightly, the skimmer doesn’t, and over a decade you get a hairline gap that opens under pressure. Return jet seals fail similarly. Both are usually fixable on the same visit with a pool-grade epoxy or, in worse cases, by cutting out the surround and remaking it.
Pool lights. The conduit running from a wet niche back to the junction box on the deck is a recognised leak path. Water tracks up the conduit, out of the niche, and quietly disappears into the surrounding earth. You’ll often spot it because the area around the deck-box stays damp when nothing else is wet. Fix: re-seal the niche fitting and put a watertight gland on the conduit at the junction box end.
Plumbing under the deck. The suction and pressure lines running from the pool to the pump room are usually under the paving. PVC joints fatigue. Ground movement (we get plenty in clay-heavy parts of the Cape) shifts pipes. Once a pressure line is compromised, the leak only happens when the pump is running — which is a useful diagnostic clue.
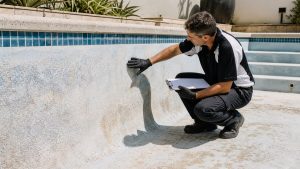
Structural cracks in the shell. Less common than people think, but real. A hairline crack across a Marbelite floor or wall, often invisible to the naked eye until you dye-test it. Usually caused by ground movement, sometimes by frost heave in higher-altitude areas (think Franschhoek), occasionally by a pool being drained without proper hydrostatic relief and floating slightly.
Equipment-side leaks. Filter housing O-rings, pump volute gaskets, multiport valve seals. Above ground in the pump room. Cheap. You’ll see the water on the slab. Worth checking the pump room before you assume the leak is structural — I’ve had two callouts in the last six months where the “structural leak” was a perished Speck pump shaft seal dripping into a French drain.
How professional leak detection actually works
When the bucket test confirms a real leak and you can’t see anything obvious, you call someone in. Here’s what should happen on a properly equipped leak detection visit.
Pressure testing of plumbing lines. We cap off each line at the pool end, attach a pressure rig at the pump room, and pressurise the line to about 1.5 bar with water or air. A line that won’t hold pressure is leaking, and we now know which line. This isolates the underground plumbing as either guilty or innocent.
Acoustic listening. If a pressurised line is losing pressure, we use a ground microphone (a sensitive geophone, essentially) along the deck above the line to listen for the leak. A water leak under pressure makes a distinctive hiss. Skilled operators can locate a leak to within a metre or so without lifting a single paver.
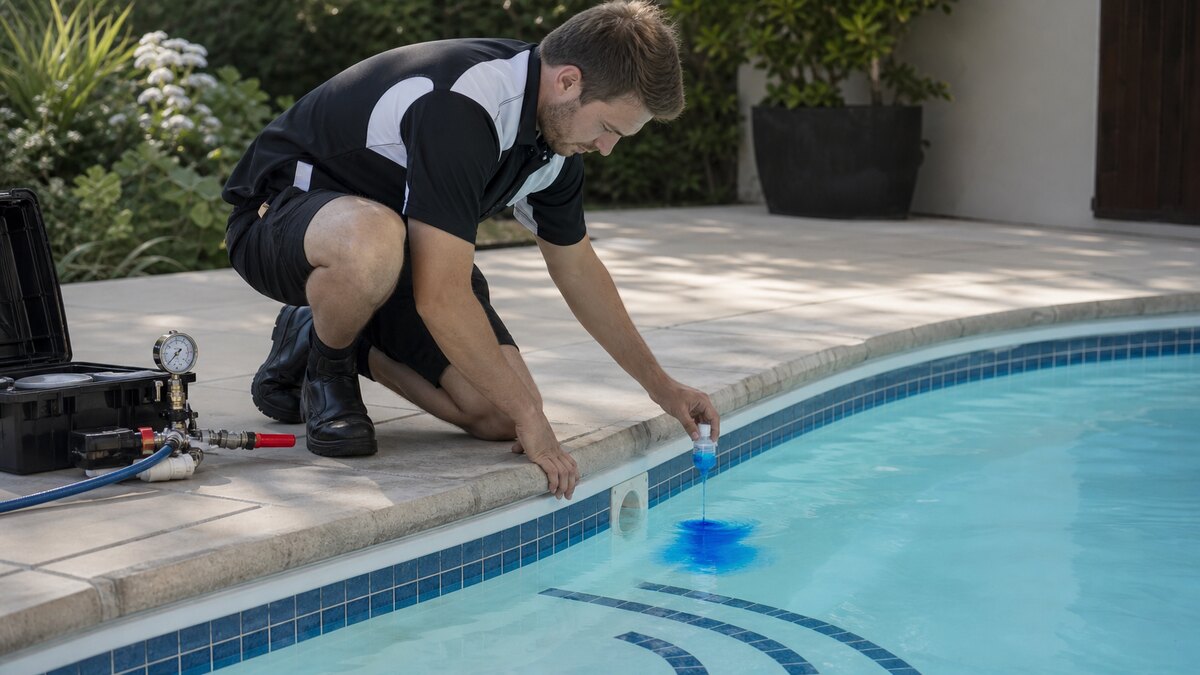
Dye testing. For suspected shell leaks, leaks at skimmer throats, or leaks at light niches, we use a small syringe of food-grade dye injected near the suspected leak with the pump off and the water dead-still. If the dye gets drawn into the leak, we’ve found it. Cheap, simple, and ruthlessly effective on small structural leaks.
Electronic shell detection. For deeper structural cracks that don’t dye-test obviously, there’s electronic equipment that detects the electrical signature of water moving through a crack in a cement shell. We use this less often (it’s expensive kit and not every job justifies it), but it’s the last resort when nothing else is conclusive.
A standard residential leak detection visit takes one to three hours. Most of that is setup and methodical elimination. The actual finding is often quick once we know which system to focus on.
Leak patterns by pool age
Pool age is a surprisingly good predictor of where the leak is.
Under 5 years old. Leaks here are almost always either equipment-side (an O-ring that wasn’t seated, a glued joint that wasn’t allowed to cure) or installation defects (light niche not sealed, return fitting not bedded in). Warranty conversations. Call your installer.
5 to 15 years old. Danger zone for skimmer throats, return jet seals, and pool light niches. Original sealants are reaching end of service life. Marbelite is starting to surface-chalk. Roughly 70% of the leak jobs I do are on pools in this bracket.
15 years and older. Structural leaks become more likely. Plumbing under the deck (especially older PVC gone brittle) starts to give up. This is also the age where I start the harder conversation about whether the smarter spend is a full resurface or fibreglass reline.
What gets fixed on the day, and what needs a return visit
If you ask me to find your leak, the goal is always to find it, quote you for the fix on the spot, and complete simple fixes the same day. Here’s roughly where the line falls.
Same visit: equipment-side leaks (O-rings, gaskets, pump seals), skimmer throat re-seals on small leaks, return jet seal repairs, light niche re-sealing, small dye-test-confirmed hairline cracks that can be epoxy-patched from the surface.
Return visit required: underground plumbing repairs (we need to lift paving), light conduit replacement (often involves an electrician), structural crack repairs that need the pool partly drained, anything requiring shell reinforcement, and any leak that turns out to be a symptom of a bigger surface failure.
I always quote both parts separately so the client knows exactly what they’re committing to. Detection fee is one line item. Same-visit repair is a second. Quoted return work is a third.
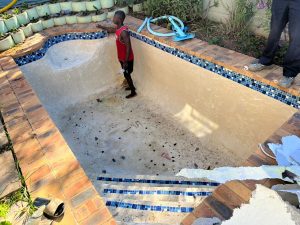
When a leak means it’s time for a resurface or reline
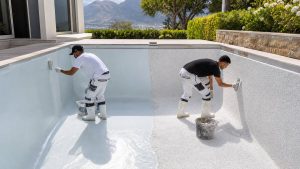
If your Marbelite shell is more than 12 to 15 years old, is showing widespread surface failure (chalking, etching, soft patches, multiple hairline cracks), and now has a leak — you’re not in patching territory anymore. You’re in resurfacing territory.
The reason is brutal economics. A leak repair on a tired shell buys you a year or two before the next leak develops somewhere adjacent. Each repair leaves a visible scar. You’ll spend R12,000 to R20,000 over three or four years patching, only to end up resurfacing anyway. Better to bite it, do a proper Marbelite resurface or a fibreglass reline, and start the clock again. If the leak is one isolated failure on an otherwise sound shell, fix the leak. If it’s the third leak in two years, have the bigger conversation.
What a leak detection actually costs in Cape Town
Pricing in the Cape Town market in 2026:
- Standard leak detection callout including the first hour of work: R1,450 to R2,800. This covers the bucket-test verification, equipment-side inspection, pressure testing of plumbing lines, acoustic listening, and dye testing.
- Additional hours beyond the first: R650 to R950 per hour for the tech.
- Same-visit minor repairs (O-rings, simple re-seals, jet gasket replacements): R450 to R1,800 on top of the detection fee.
- Skimmer throat or return jet structural re-seal: R1,800 to R4,500 depending on the extent.
- Pool light niche re-seal: R1,200 to R2,800 (more if the light fitting needs replacement).
- Underground plumbing repair, including lifting and reinstating paving: R6,500 to R18,000 depending on access and the number of joints to be remade.
- Structural crack repair with proper grinding-out and resin injection: R4,500 to R12,000 per crack.
An honest practitioner will quote the detection fee up front and not bury surprise repair costs in it. If someone won’t tell you what the call will cost before they arrive, walk away.
The water-restrictions context, and why this matters more in Cape Town than anywhere else
You don’t need me to remind you of 2018. Day Zero. Level 6B. 50 litres per person per day. Pools became politically loaded — you couldn’t fill them, couldn’t top them up, couldn’t backwash to drain. A lot of owners drained their pools and converted them to plunge ponds or rainwater storage.
We’re not back at Level 6, but as of mid-2026 the City has declared an Early Drought Caution. Combined dam levels in the Western Cape Water Supply System are the lowest at this point in the year since 2018. Level 1 or Level 2 restrictions are realistic for the second half of 2026 depending on how the winter rainfall lands. At Level 2, you can’t top up a pool from the mains at all — only from a rainwater tank or borehole.
Municipal bylaws are stricter now than they were pre-Day-Zero. Pool covers are effectively required for unused pools. Autofills from a potable mains supply are not permitted regardless of restriction level. Punitive tariffs kick in hard above the household allocation, so a serious leak can cost you tens of thousands of rands in unnoticed mains water before you spot it. A leak isn’t a “fix it when you have time” job in Cape Town. It’s a “fix it this month” job.
What to do this weekend if you suspect a leak
Run the bucket test on Saturday morning. Take photos. Read the result on Sunday morning before the sun gets onto the pool. If it confirms a leak, isolate any autofill, take a meter reading, and put a cover on the pool until you’ve had it looked at. That alone will stop the bleeding while you wait for a detection appointment.
For a professional leak detection done properly — pressure tests, acoustic listening, dye testing, written report and a firm quote on whatever we find — see our leak detection and repair services and book through our quote form, or phone us on +27 62 635 8990. We cover the full Cape Peninsula and the Winelands and usually get to you within two or three working days.
The full range of repair and refurbishment work we handle once a leak is identified is worth a look too.